Hello!
I have always dreamed of beautiful dark cabinets in my kitchen...they hide dirt and grime and bring an overall warmth to the room. During our long and strenuous search for a home to buy, I didn't see a single kitchen with dark cabinets! I was sure my dreams would have to wait and so we settled on this kitchen...
(I was overall happy with the layout of the kitchen, but not crazy about the cabinets)
In our bargaining with the seller we asked that all the paint was left for us in case we needed to do any touch ups...imagine my surprise when I found a Rustoleum Cabinet Transformations kit in the kitchen pantry! I had noticed the the vanities in the bathrooms were a nice dark color but had no idea the previous owners had used the kit
(our house was flipped, so they did A LOT of updating...hello new appliances, paint and carpet!)
and so the adventure of updating the cabinets begins...
The first thing we did was take off all the cabinet doors, remove the hinges and take out all the drawers. The first step in the kit is to use the deglosser...this allows you to paint over your cabinets without having to sand.
(no sanding = happy wife)
However, it was quite the task deglossing EVERY surface we wanted to paint. I had read several reviews of the kit and how to make it work the best and one of the biggest things was making sure you were very thorough during the deglossing process...a poor job deglossing means the paint won't properly adhere to your cabinets.
We did the whole kitchen over a few days so we spent one night deglossing everything and then left, according to the directions you need to let the cabinets dry at least 1 hour after you've deglossed. We hadn't moved in to the house yet so having my kitchen torn apart wasn't a big deal. You could totally do little parts at a time if that works better for your household.
The next day...after a long day at work...we returned to paint on the first bond coat. When you buy the kit you either buy the one for light cabinets or dark cabinets and then have the paint counter tint your base for you. Here's the exact specifications for the color we used:
I spread out the kitchen cabinets...very carefully on top of cardboard in the living room...and we got to work. I let the first coat dry overnight...it says to allow 2-3 hours between coats...and then added another coat the next day and again let it dry overnight.
The next step is optional. We decided to add the decorative glaze because it darkens the color a bit more and adds a cool wood grain look instead of just flat paint. Essentially you paint the glaze on then wipe it off with the cheesecloth that comes in the kit. I painted and Steve wiped. They suggest one person does all the wiping so that you have a uniform look. I was unsure of how this would look when it turned out but I ended up loving it! Here's a close up of what it looks like with the glaze:
The final step is to add the protective top coat. This was by far the most complicated step. It goes on a sort of milky color but it absolutely dries white if you put it on too thick. I was very careful to put on thin coats and watch for pooling. Also be sure to watch for drips on the sides, I just went over them lightly with my paintbrush...I love the Wooster Short Cut, it has a soft handle and is easy to control.
After about a week of painting and lots of slave labor from my husband...see below...I finally had a kitchen with dark cabinets!
(that's a good husband...)
(Don't mind the one missing cabinet door...I didn't degloss it well enough and had to repaint part of it)
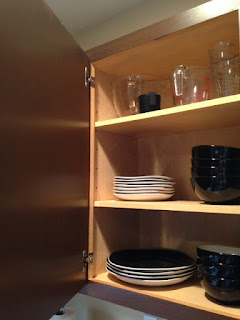
We also didn't paint the inside of the cabinets...you're not supposed to...but you probably could if your really wanted to. I thought the two different colors would bother me but it really isn't that big of a deal.
Overall, the kit was easy to use and definitely worth the time and effort. We've used the kitchen for about 6 months now and haven't had any issues with the coating coming off or even being scratched. We had the large kit and it covered the entire kitchen and three bathroom vanities. We have a little bit left over which I plan on using to paint the moulding that I'm going to be using to frame in our bathroom mirrors.


No comments:
Post a Comment