Sunday, July 26, 2015

DIY Script Sign


Hello there!

We used to have some lovely chef themed plaques hanging above our kitchen window until I found that one had seemingly fallen off the wall at some point.
(either that or our house is haunted...)
I had been looking around for something interesting to put above the window and found a quote that I really loved and thought would be nice to have hanging in the house.


With my husband being out of town, it was a perfect time to set about crafting.  I went rummaging around my dad's garage and found the perfect piece of wood that used to be part of an old table.  Lucky for me, it already had some nice antiquing, so I didn't have to do anything extra.  I just cleaned it off with some mineral spirits.


Now, some people have the talent necessary to create beautiful script writing.  I am not one of those people. So here's the trick I use to make pretty things with pretty writing.  I downloaded the font Bombshell Pro (for free, of course) and typed up the quote in Word.  I blew it up to something like 150 size font and printed it out.  It's only in red because I didn't have any black ink.  The next step is to color over the back of the print with pencil.  You want to make sure you cover every part of the writing.  What you are doing is essentially creating a carbon transfer.


Next, I laid out my sheets of paper to get an idea of how it was all going to work out.


Luckily, it all fit on there pretty perfectly.  I then used a rotary cutting ruler to make sure my words would be straight.  I lined up it up with the edge of the board and the bottom of my piece of paper, then taped the paper down with masking tape.


To transfer the pencil onto the surface, you just trace over the outline of the font with pen.  You want to push pretty hard.  Before I painted I went over the words again in just pencil so that I could see them easier.  If you're working with a lighter surface, this won't be necessary.


Repeat the lining up and the tracing until you've done the whole thing.


If you look closely you can see a few different words. It's ok if it's not perfect since you're just going to paint over it.

I used a small paintbrush and this metallic acrylic paint that I got at Target for a couple bucks to do the painting.  I wasn't sure if it was going to be opaque enough, but it turned out just fine!


In all this project took probably 2 hours.  Overall though I'm very happy with the finished product!  Don't be afraid to tackle something with pretty lettering, it's really easy using this carbon transfer method!


Sunday, July 12, 2015

Garage Floor Makeover


So when we bought our house back in January we had a...well..."interesting" garage situation. The garage was previously used as some sort of living quarters...we're talking full wall to wall carpet and nicely painted walls that match the interior of the house. That's all well and good but...my husband is a mechanic and wants to do mechanic-y things in the garage.  And thus lead to our purchase of this:


We got it at Home Depot for somewhere around $100.  We also bought it in the dead of winter...after reading the instructions we realized this project was going to have to wait until we had MUCH warmer weather...the concrete in your garage has to be something like 60 degrees before you paint.

Steve took over the wonderful job of removing the carpeting from the garage and many months later, I set out to apply the epoxy.  We were left with a bunch of nail holes in the concrete from pulling out the carpet. Before painting, I went through and filled all of them in with concrete crack filler.


(There were A LOT of holes...it was like this around the perimeter of the garage...not a pleasant experience)

I went through and filled all the holes like so...I just squeezed some filler in the holes then went over it with a putty knife to smooth it out.  I then let it dry for 24 hours (as according to the directions).


We don't have a ton of stuff in our garage, but enough that I was not willing to leave it in my driveway for at least 24 hours while the flooring sealed, so I moved everything to one side of the garage and set to work.  

The first step is to use the etching salt.  You'll need to drag your hose into your garage for this step and have a watering can handy. First you need to wet your floor. Then, you mix the salt and 2 gallons of water together in the watering can and then pour it on your floor in about a 4x4 foot section at a time and scrub away with a brush.  We had a sturdy bristle broom that I used but they say a wire bristle brush would be best.
 (I was not about to go out and spend money on one)

 After you're done scrubbing each section, rinse it off and move on to the next until you've done the whole area you're going to paint.  My garage took a couple hours to dry completely, I just left the garage cracked and ran a couple errands in the mean time. 

The epoxy comes in a two part system.  You have to mix the two parts together...I mixed mine in a 5 gallon bucket because I wasn't sure there was enough room in one of the paint cans for both parts. You only have about an hour or so to work before the epoxy starts to cure so make sure you have all your painting materials ready before you mix the paints!  I went around and cut in with an angled brush (I LOVE the Wooster ShortCut) and then started painting using a roller attached to a pole.


I painted a 3 to 4 square foot section at a time and then threw down the paint chips that come with the kit.  They're completely optional but we decided to go for it.  I poured them out of the bag into a bowl so I could grab handfuls easier.  You pretty much just throw them up above the painted area and the spread out nicely as they fall down.  I repeated this process until I had covered the whole area. Here you can see what the paint chips look like...next to my feet for scale!


I did the other half of the garage a few days later and then let it dry overnight before I started putting things away.


(We also painted the door from the garage into the house black when we moved in.  Steve anticipated having greasy and dirty hands and didn't want to mess up our white door, so we painted it!)


I'm also pretty happy with the new use for the pallet that Steve's toolbox came on.  It keeps everything corralled an prevents stuff from falling over.


The next step is to get some more hanging storage and get a workbench so we can clear up some more space and have a place to put all the random odds and ends!

The epoxy will be nice for Steve to work on because it prevents any oils from soaking into the concrete, you can pretty much just wipe it up.  The whole process was easy, but time consuming.  The only thing that was a pain was the clean up. I had to make sure to really rinse my paintbrush and roller out well so that they wouldn't harden from the epoxy. The kit come with a how-to instruction video that is helpful too! 
(though it is absolutely hilarious how much the woman in it seems to be loving throwing the paint chips...you should probably watch it just for a laugh)
I would definitely recommend this product...we used Rustoleum when we did our kitchen cabinets and that company totally came through for us again with the garage epoxy!


Thursday, July 9, 2015

DIY Key Hideaway

Hello!

I've always been sort of a neat freak about clutter...having random junk on my counters just stresses me out! When we bought our new house I wanted to find some solutions to cut down on the inevitable clutter (especially with a not so neat husband). I had seen on Pinterest a cool idea that involved using a picture frame to cover where you hang your keys...and so I set off to Ross to find a cheap and cute frame that would work for my project. I ended up spending $13 on this print that I absolutely love!  I then ventured to Home Depot (I'm surprised they don't know Steve and I by name now) to pick up some hinges and super glue.

I didn't want to screw the hinges into the frame of the print so I glued them instead...I just used some superglue and let them sit for a few minutes before hanging it up.  You can see here how I situated them on the frame...I put one about three inches from the top and one three inches from the bottom:


(It definitely took me a few minutes, and a few giggles from my husband, to figure out exactly how I wanted the hinges to work.  Make sure you have them so they open the correct way!)

You can see here that the frame I picked sits about and inch and a half off the wall, it probably would have been better to have it a little deeper, but it's the best I could find.


I screwed in some cheapo cup hooks, also from Home Depot I believe, hung up the keys and wa-la, no more keys sitting on my counter!


Here you can see the hinges with the picture closed.


Straight on, you can't even tell that the picture opens and closes.  I'm loving that it keeps my keys organized but also hides them! Overall, the project cost less than $20 and we use it everyday!


Tuesday, July 7, 2015

Rustoleum Cabinet Transformations


Hello!

I have always dreamed of beautiful dark cabinets in my kitchen...they hide dirt and grime and bring an overall warmth to the room.  During our long and strenuous search for a home to buy, I didn't see a single kitchen with dark cabinets!  I was sure my dreams would have to wait and so we settled on this kitchen...

(I was overall happy with the layout of the kitchen, but not crazy about the cabinets)


In our bargaining with the seller we asked that all the paint was left for us in case we needed to do any touch ups...imagine my surprise when I found a Rustoleum Cabinet Transformations kit in the kitchen pantry!  I had noticed the the vanities in the bathrooms were a nice dark color but had no idea the previous owners had used the kit 
(our house was flipped, so they did A LOT of updating...hello new appliances, paint and carpet!)
and so the adventure of updating the cabinets begins...


The first thing we did was take off all the cabinet doors, remove the hinges and take out all the drawers. The first step in the kit is to use the deglosser...this allows you to paint over your cabinets without having to sand.
(no sanding = happy wife)

However, it was quite the task deglossing EVERY surface we wanted to paint.  I had read several reviews of the kit and how to make it work the best and one of the biggest things was making sure you were very thorough during the deglossing process...a poor job deglossing means the paint won't properly adhere to your cabinets. 

We did the whole kitchen over a few days so we spent one night deglossing everything and then left, according to the directions you need to let the cabinets dry at least 1 hour after you've deglossed.  We hadn't moved in to the house yet so having my kitchen torn apart wasn't a big deal. You could totally do little parts at a time if that works better for your household.

The next day...after a long day at work...we returned to paint on the first bond coat.  When you buy the kit you either buy the one for light cabinets or dark cabinets and then have the paint counter tint your base for you.   Here's the exact specifications for the color we used:


I spread out the kitchen cabinets...very carefully on top of cardboard in the living room...and we got to work. I let the first coat dry overnight...it says to allow 2-3 hours between coats...and then added another coat the next day and again let it dry overnight.


The next step is optional.  We decided to add the decorative glaze because it darkens the color a bit more and adds a cool wood grain look instead of just flat paint. Essentially you paint the glaze on then wipe it off with the cheesecloth that comes in the kit.  I painted and Steve wiped.  They suggest one person does all the wiping so that you have a uniform look.  I was unsure of how this would look when it turned out but I ended up loving it!  Here's a close up of what it looks like with the glaze:


The final step is to add the protective top coat.  This was by far the most complicated step.  It goes on a sort of milky color but it absolutely dries white if you put it on too thick.  I was very careful to put on thin coats and watch for pooling.  Also be sure to watch for drips on the sides, I just went over them lightly with my paintbrush...I love the Wooster Short Cut, it has a soft handle and is easy to control.

After about a week of painting and lots of slave labor from my husband...see below...I finally had a kitchen with dark cabinets!
(that's a good husband...)


(Don't mind the one missing cabinet door...I didn't degloss it well enough and had to repaint part of it)

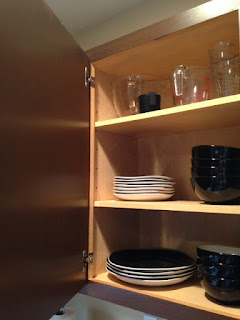
We also didn't paint the inside of the cabinets...you're not supposed to...but you probably could if your really wanted to. I thought the two different colors would bother me but it really isn't that big of a deal.


Overall, the kit was easy to use and definitely worth the time and effort.  We've used the kitchen for about 6 months now and haven't had any issues with the coating coming off or even being scratched.  We had the large kit and it covered the entire kitchen and three bathroom vanities.  We have a little bit left over which I plan on using to paint the moulding that I'm going to be using to frame in our bathroom mirrors.